Last Update: 29. Aug. 2024
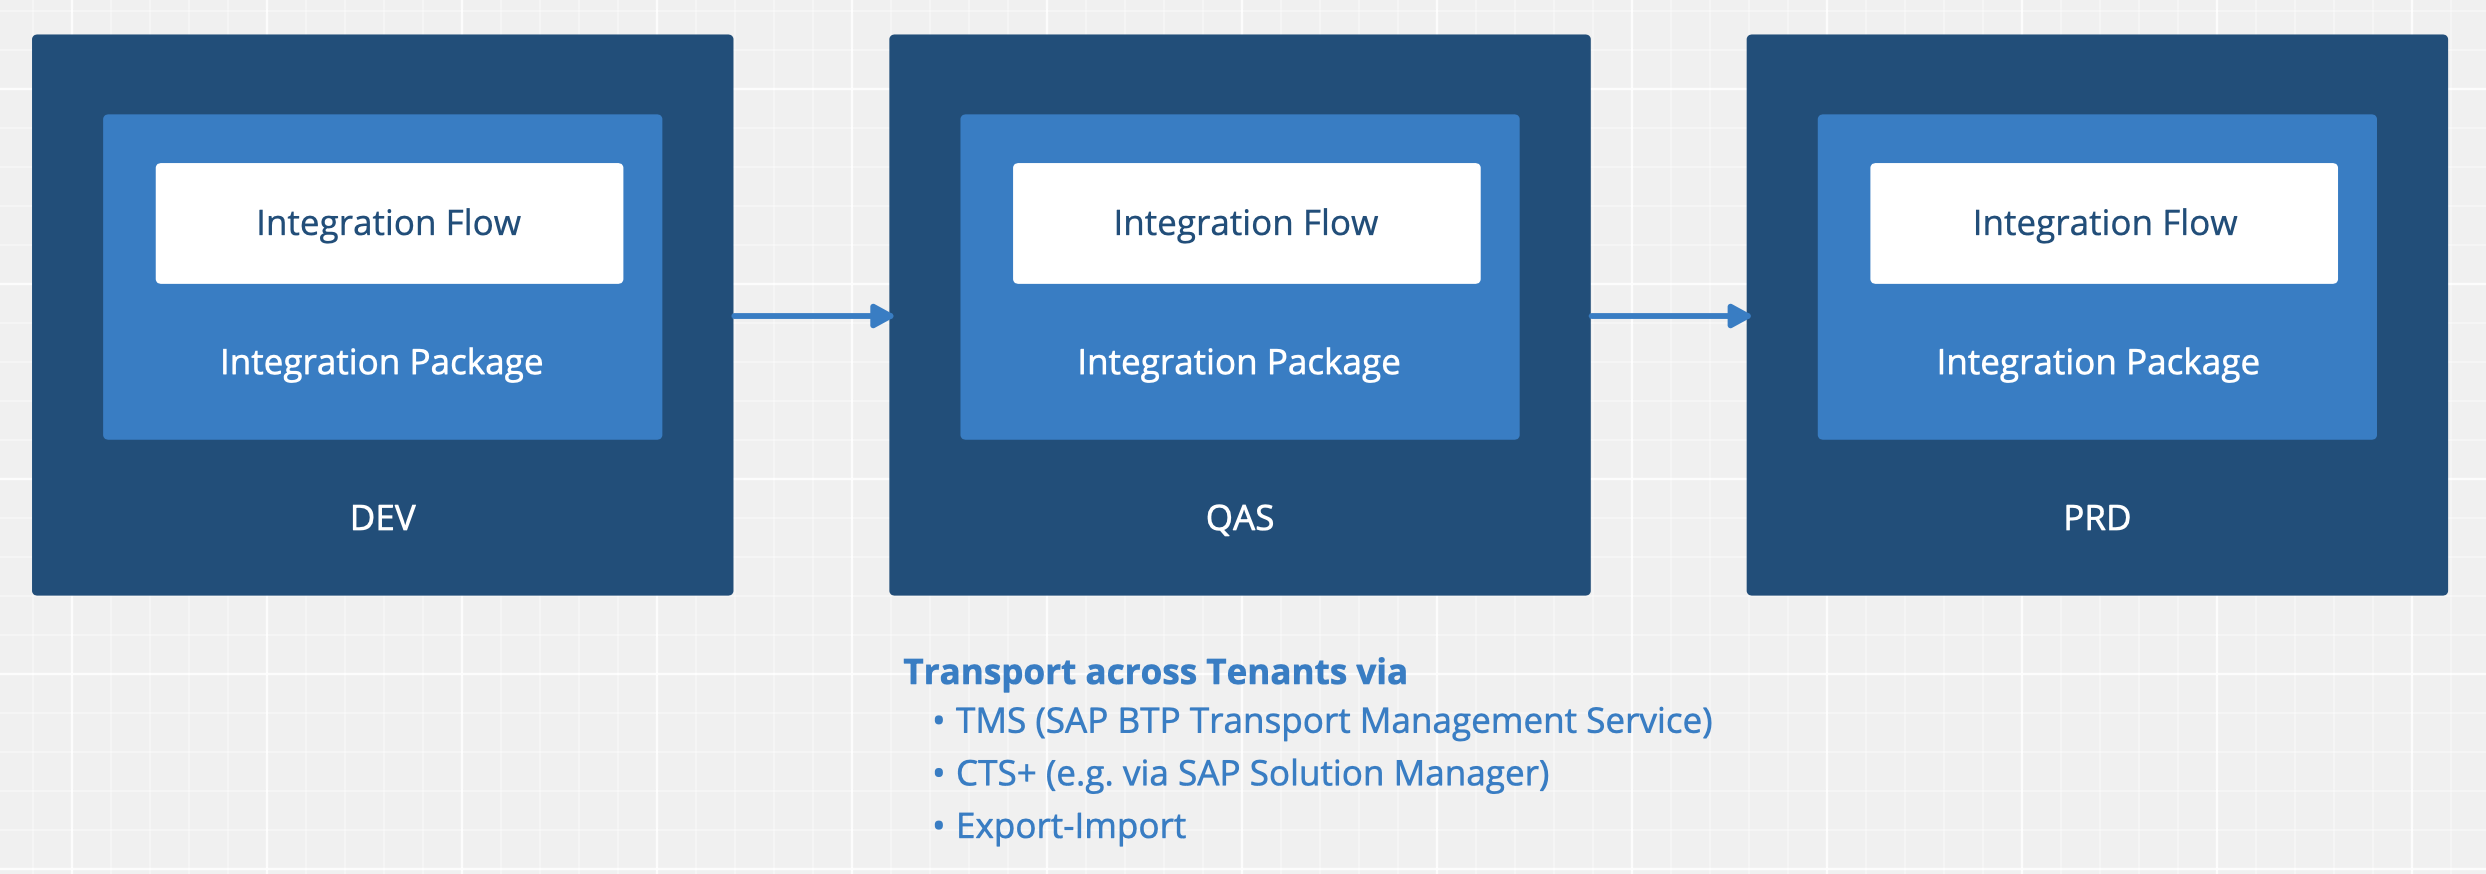
Transports across Tenants (Neo & Cloud Foundry, Integration Suite/CPI) usually works like this:
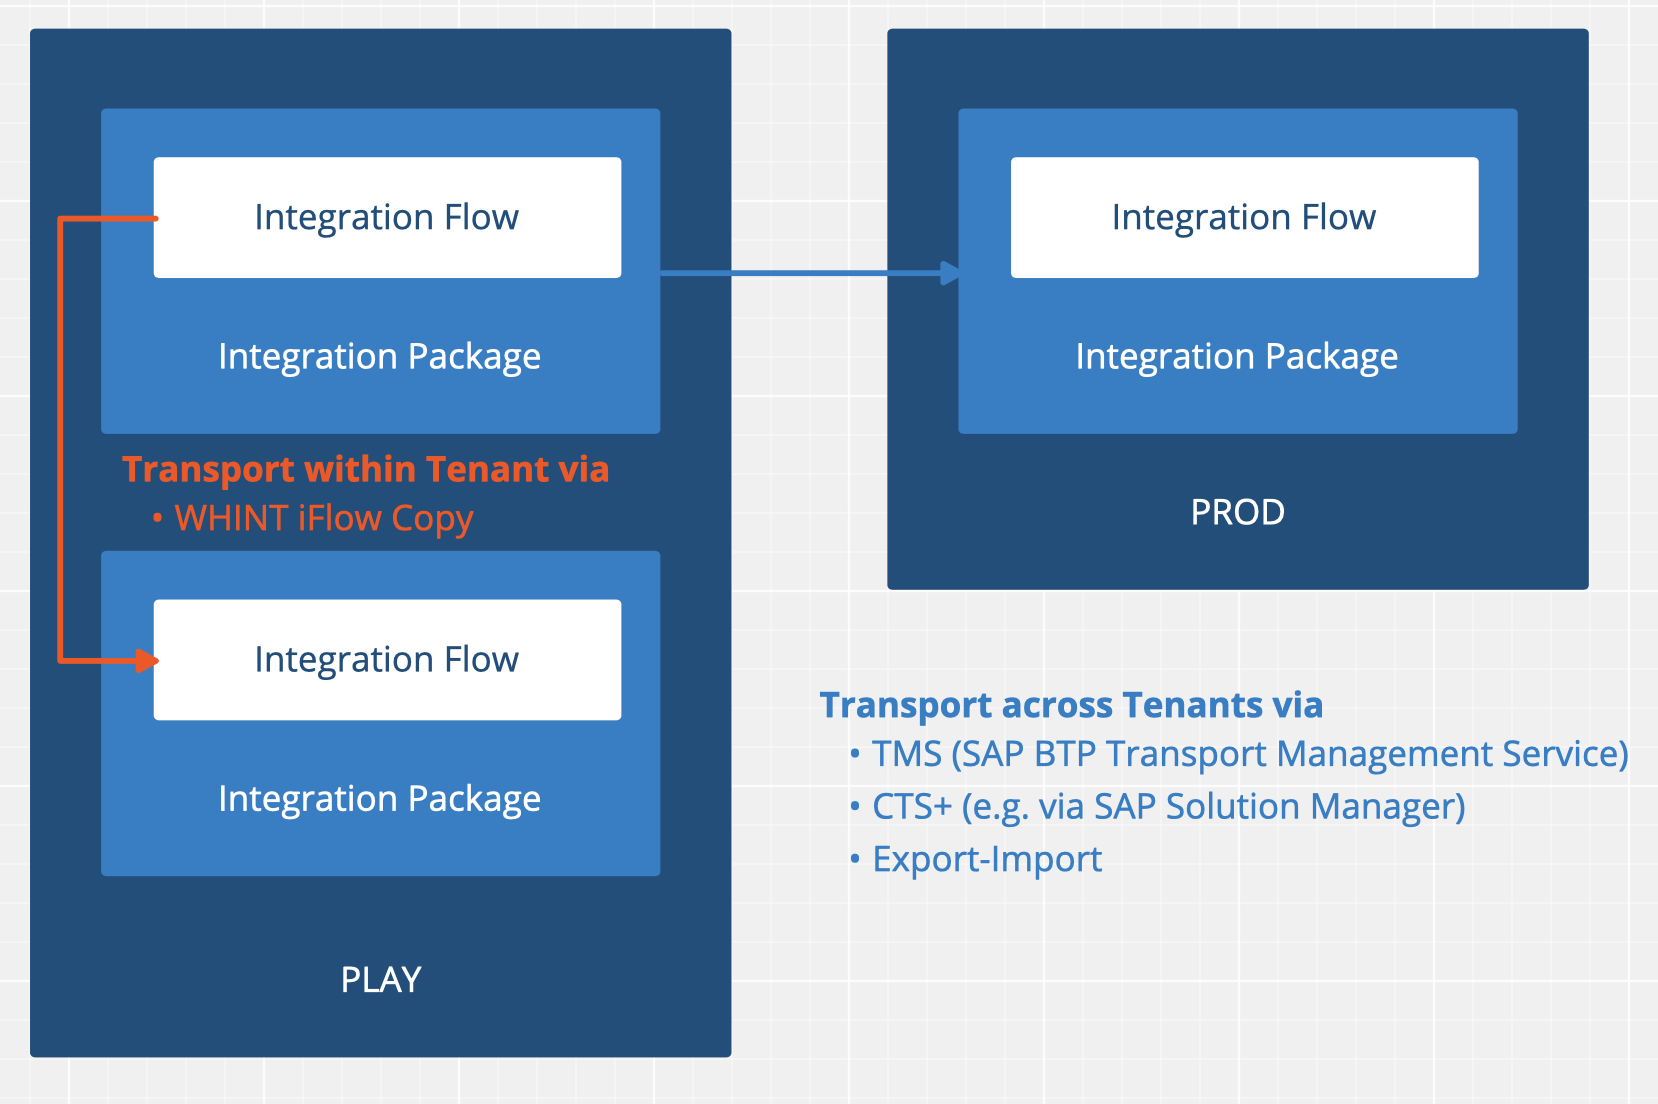
But, what if we want to manage (and pay for) only a 2-tier landscape (e.g. PLAY & PROD)?
Managing local copies of Integration Flows is a way, but what if you have change and sync them after having done some updates?
Sometimes we do not even need a 3-tier landscape, because the System (Non-SAP-Application or Partner) only provides one or 2 environments.
This article is for those companies, who want to manage only a 2-tier environment, but also need a way to safely copy artifacts (create and update) in an automated way.
Approach
The work is done through an Integration Flow (the Integration Package is available for download on Github)
The iFlow “WHINT iFlow Local Transport” copies the source iFlow to a new one (target)
- KEEPING the NAME (this is important to be able to compare the version afterwards)
- ADDING a SUFFIX to the ID
- into any Integration Package
- both create and update
- if the iFlow id already exists in a different package (not the target package), you will get an error
Procedure
- You select a source Integration Flow ID (from a source Package)
- You select a target Integration Package ID (can be a generic DEV package or even the package of the source iFlow)
- You decide for a suffix which is added to your iFlow ID (e.g. .DEV)
This can be done by entering the values into the configuration of WHINT iFlow Local Transport or by calling a HTML page.
Execution (Usage) Modes
- Background (enter values in iFlow configuration) and deploy (RUN ONCE is preselected)
- Browser (call a URL)
Configuration & Setup
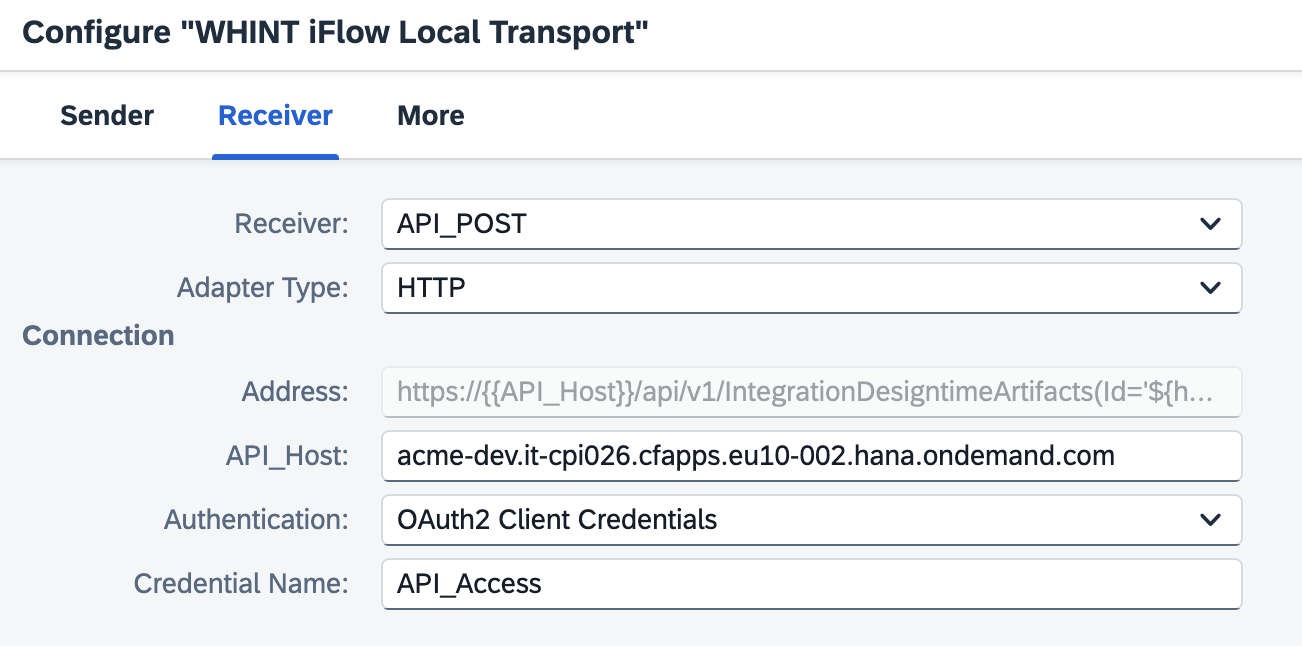
You have to enter API_Host and Credential Name and select an Authentication.
- For Cloud-Foundry Integration Suite you create a service instance (type: SAP Process Integration Runtime, plan: api) in BTP cockpit and create a service key. Find more info here. You will find 4 values for your User Credentials (type: OAuth):
- tokenurl
- clientid
- clientsecret
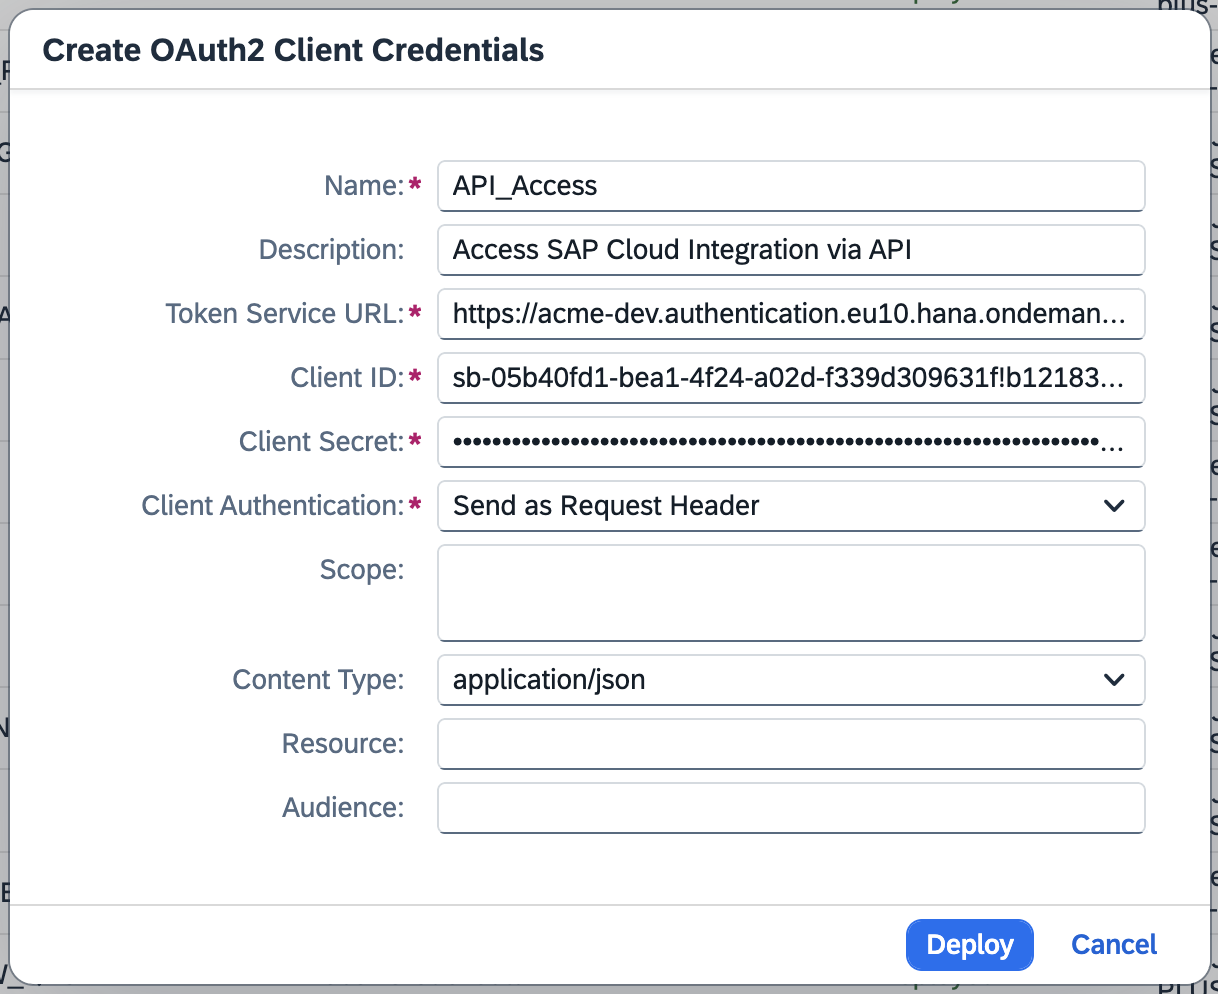
The 4th value (url) is entered as API_Host (tenant management host) in the iFlow configuration.
- For CPI on Neo you can use Basic Authentication (S-User) and you can get the API_Host directly from your browser
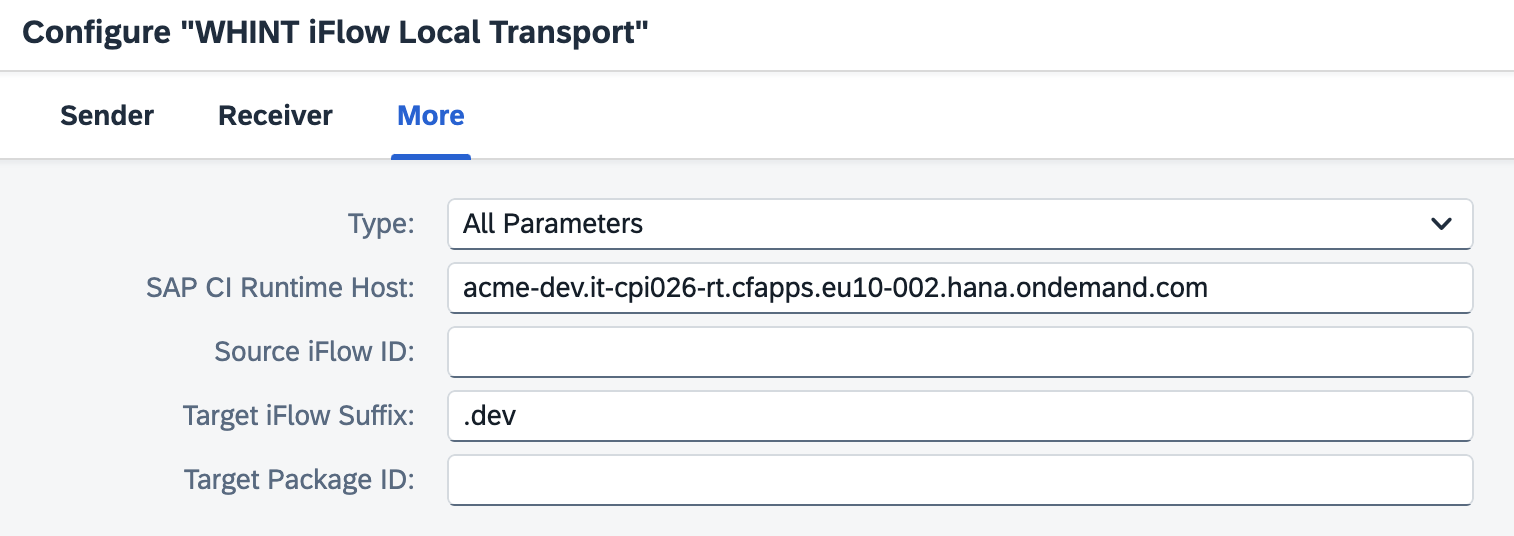
1 – You have to enter the SAP CI Runtime Host.
You can get it from your deployed iFlows (the host of the URL which is called) or you add (for Cloud Foundry only) “-rt” to the domain name:
- API_Host: https://acme-dev.it-cpi026.cfapps.eu10-002.hana.ondemand.com
- SAP CI Runtime Host: https://acme-dev-rt.it-cpi026.cfapps.eu10-002.hana.ondemand.com
2 – Enter a Target iFlow Suffix: This value is added to the (copied) Target iFlow ID.
3 – In Background mode you can enter Source iFlow ID and Target Package ID, for Browser Mode it is not required.
Deploy the iFlow.
Monitoring (Background Mode) to see if the COPY was successful:
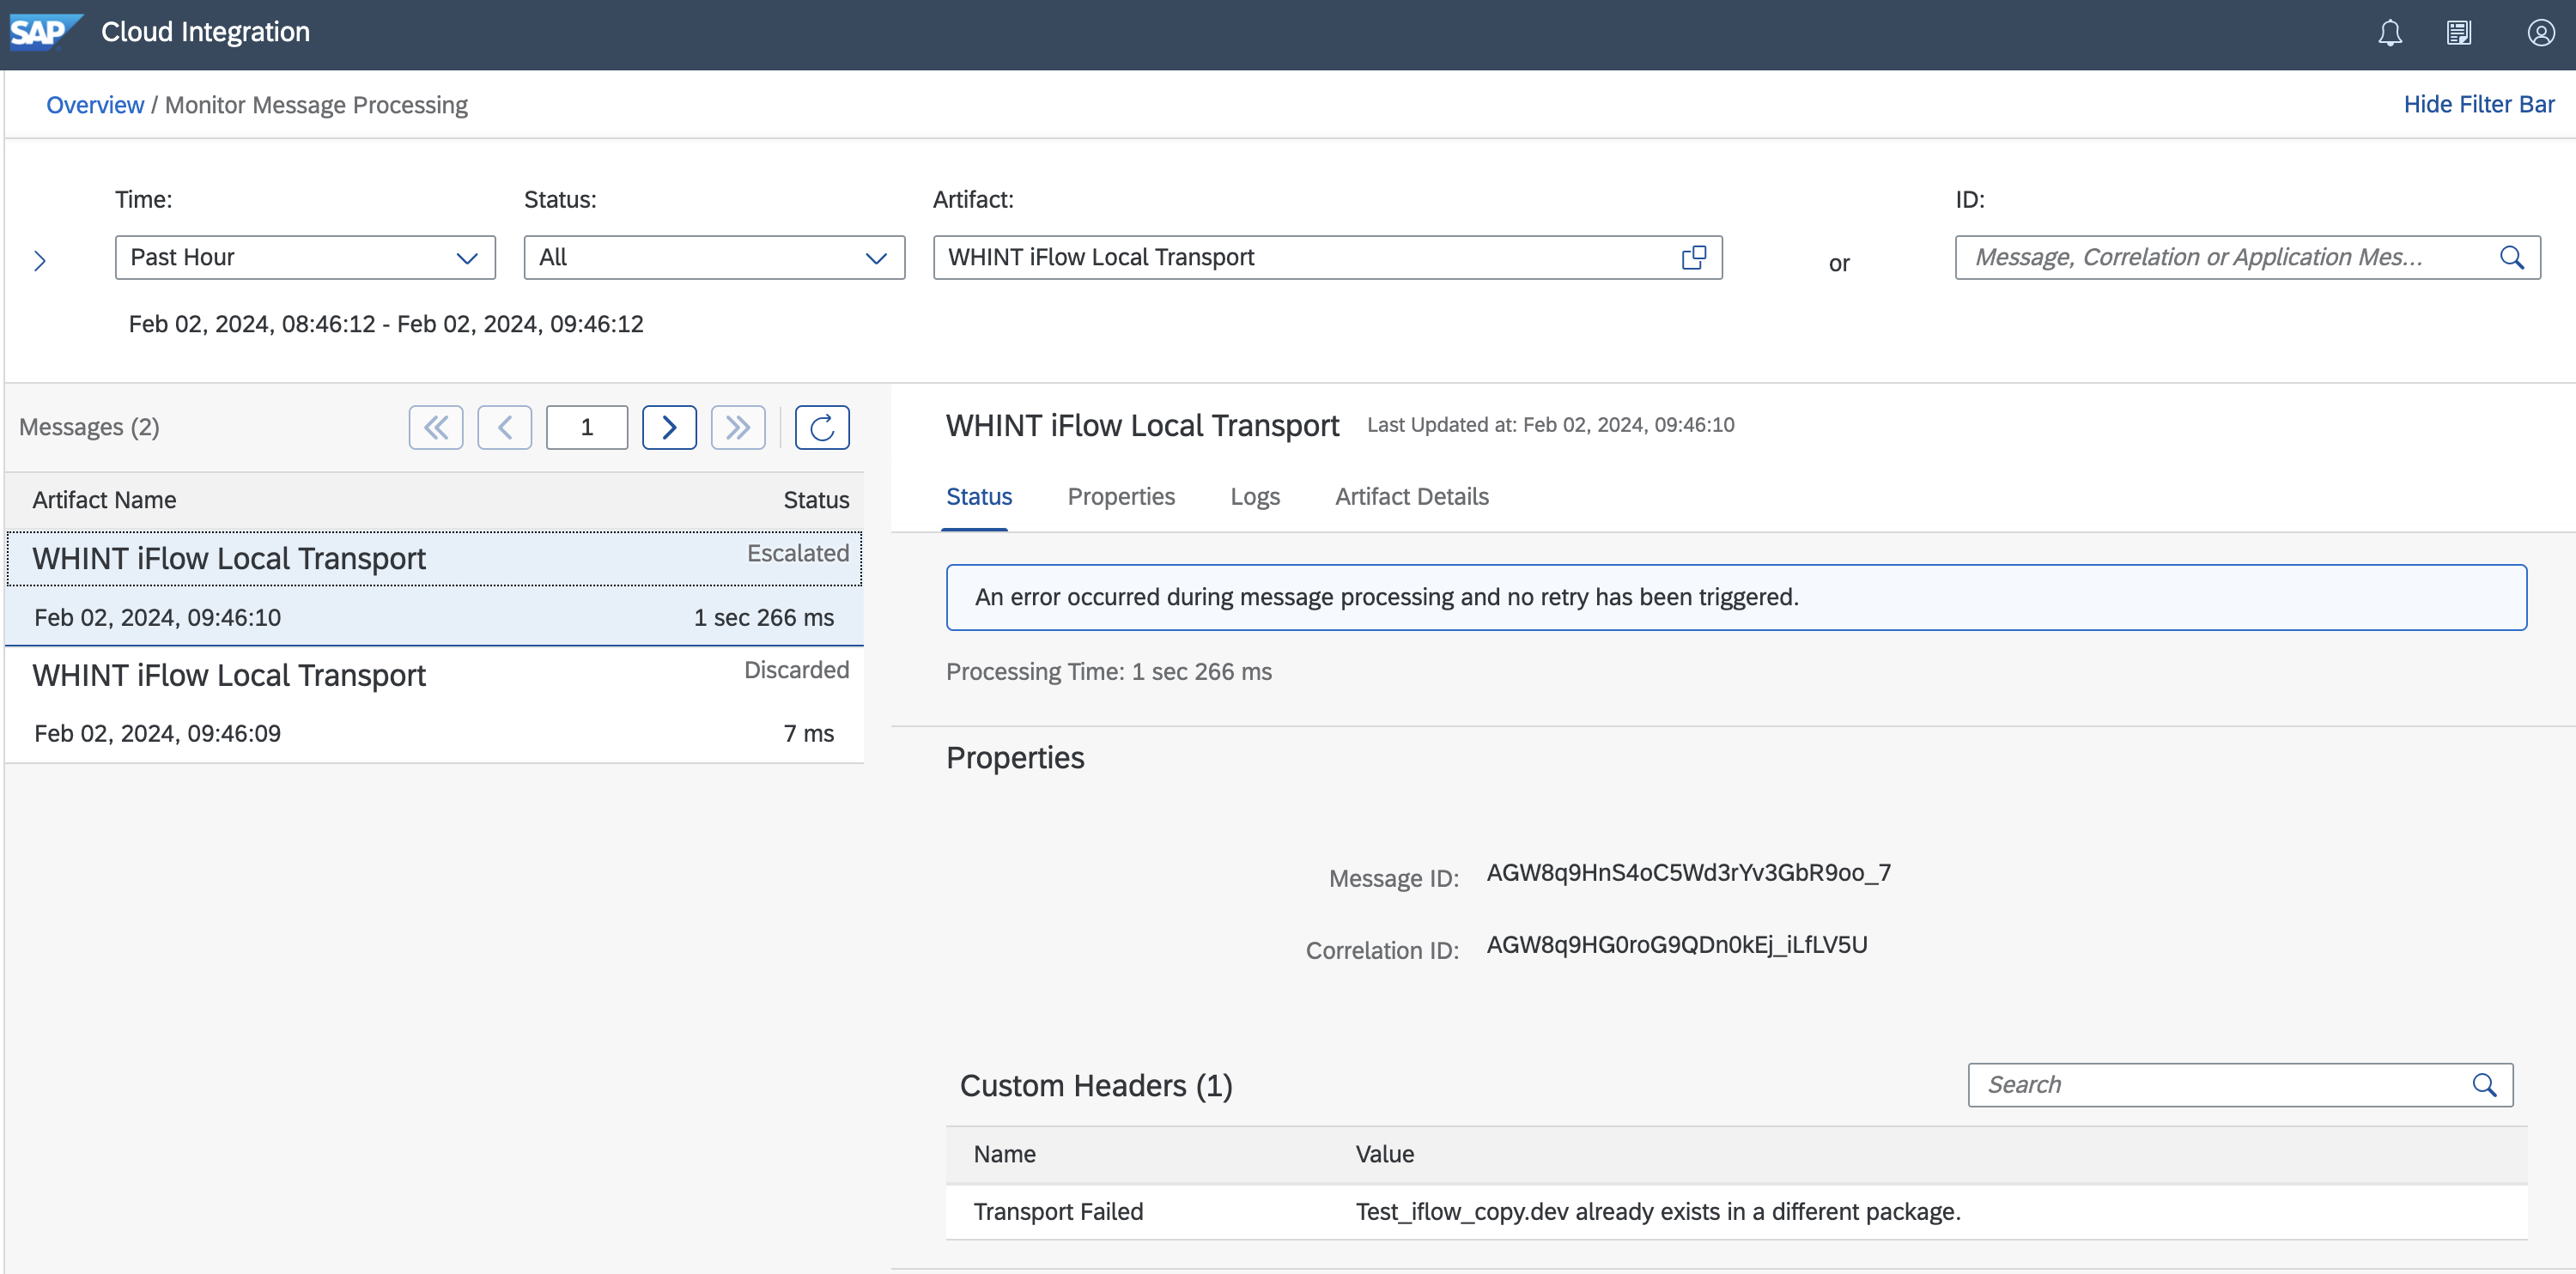
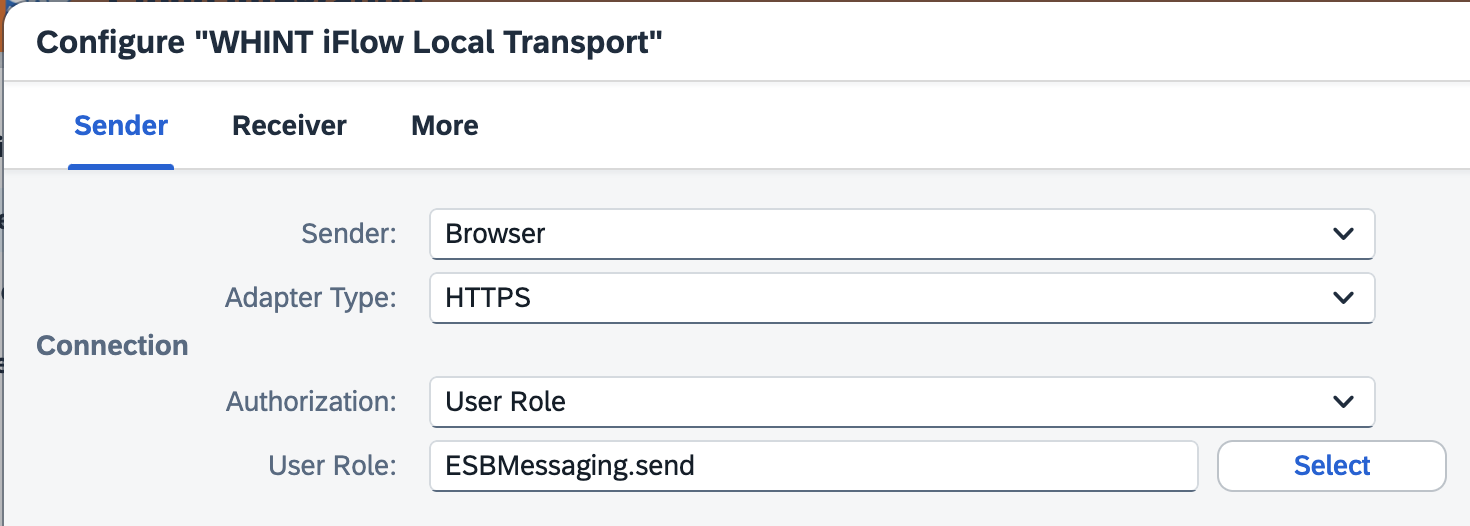
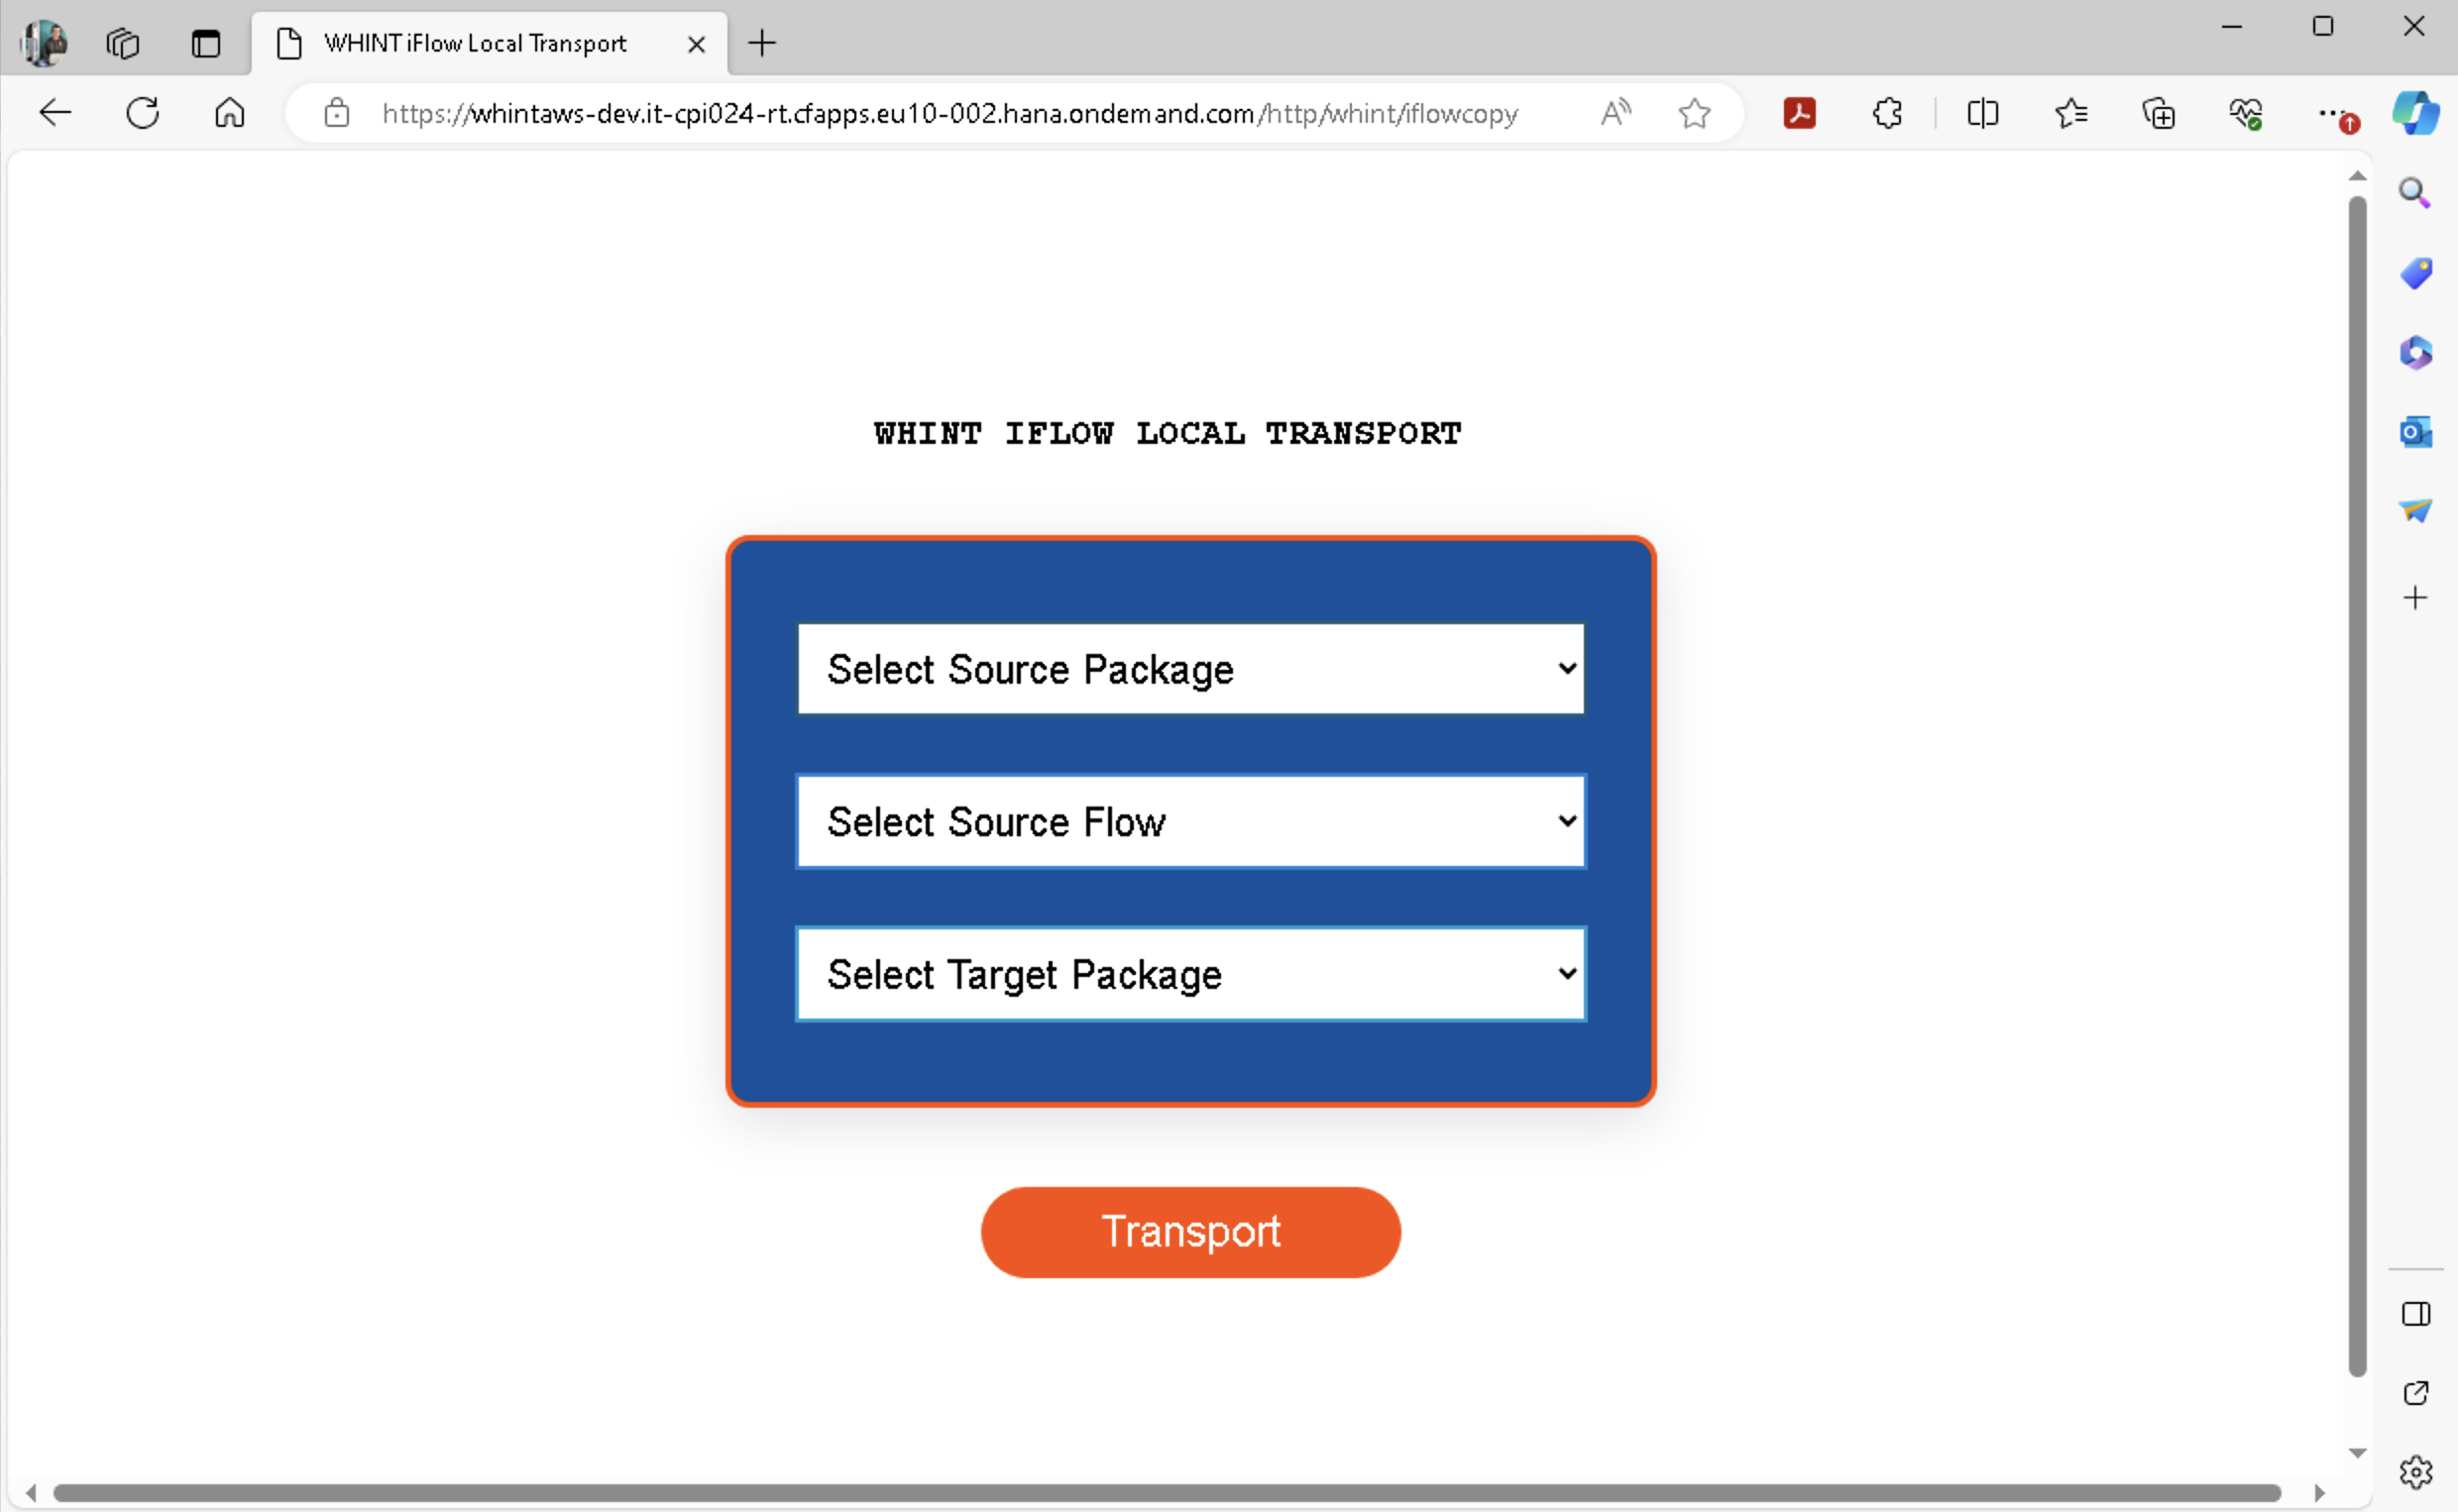
Launch the URL of the deployed iFlow (ending with /http/whint/iflowcopy) in the browser and enter your credentials or select your certificate:
To be able to call the configuration UI from the browser, your user needs the role ESBMessaging.send (or whatever role you configure), you can also use a user from the Service Key (Runtime, not API, see blogpost).
Please be aware that you have to use the password of your S-User, NOT the one of the Universal ID (which can represent several users).
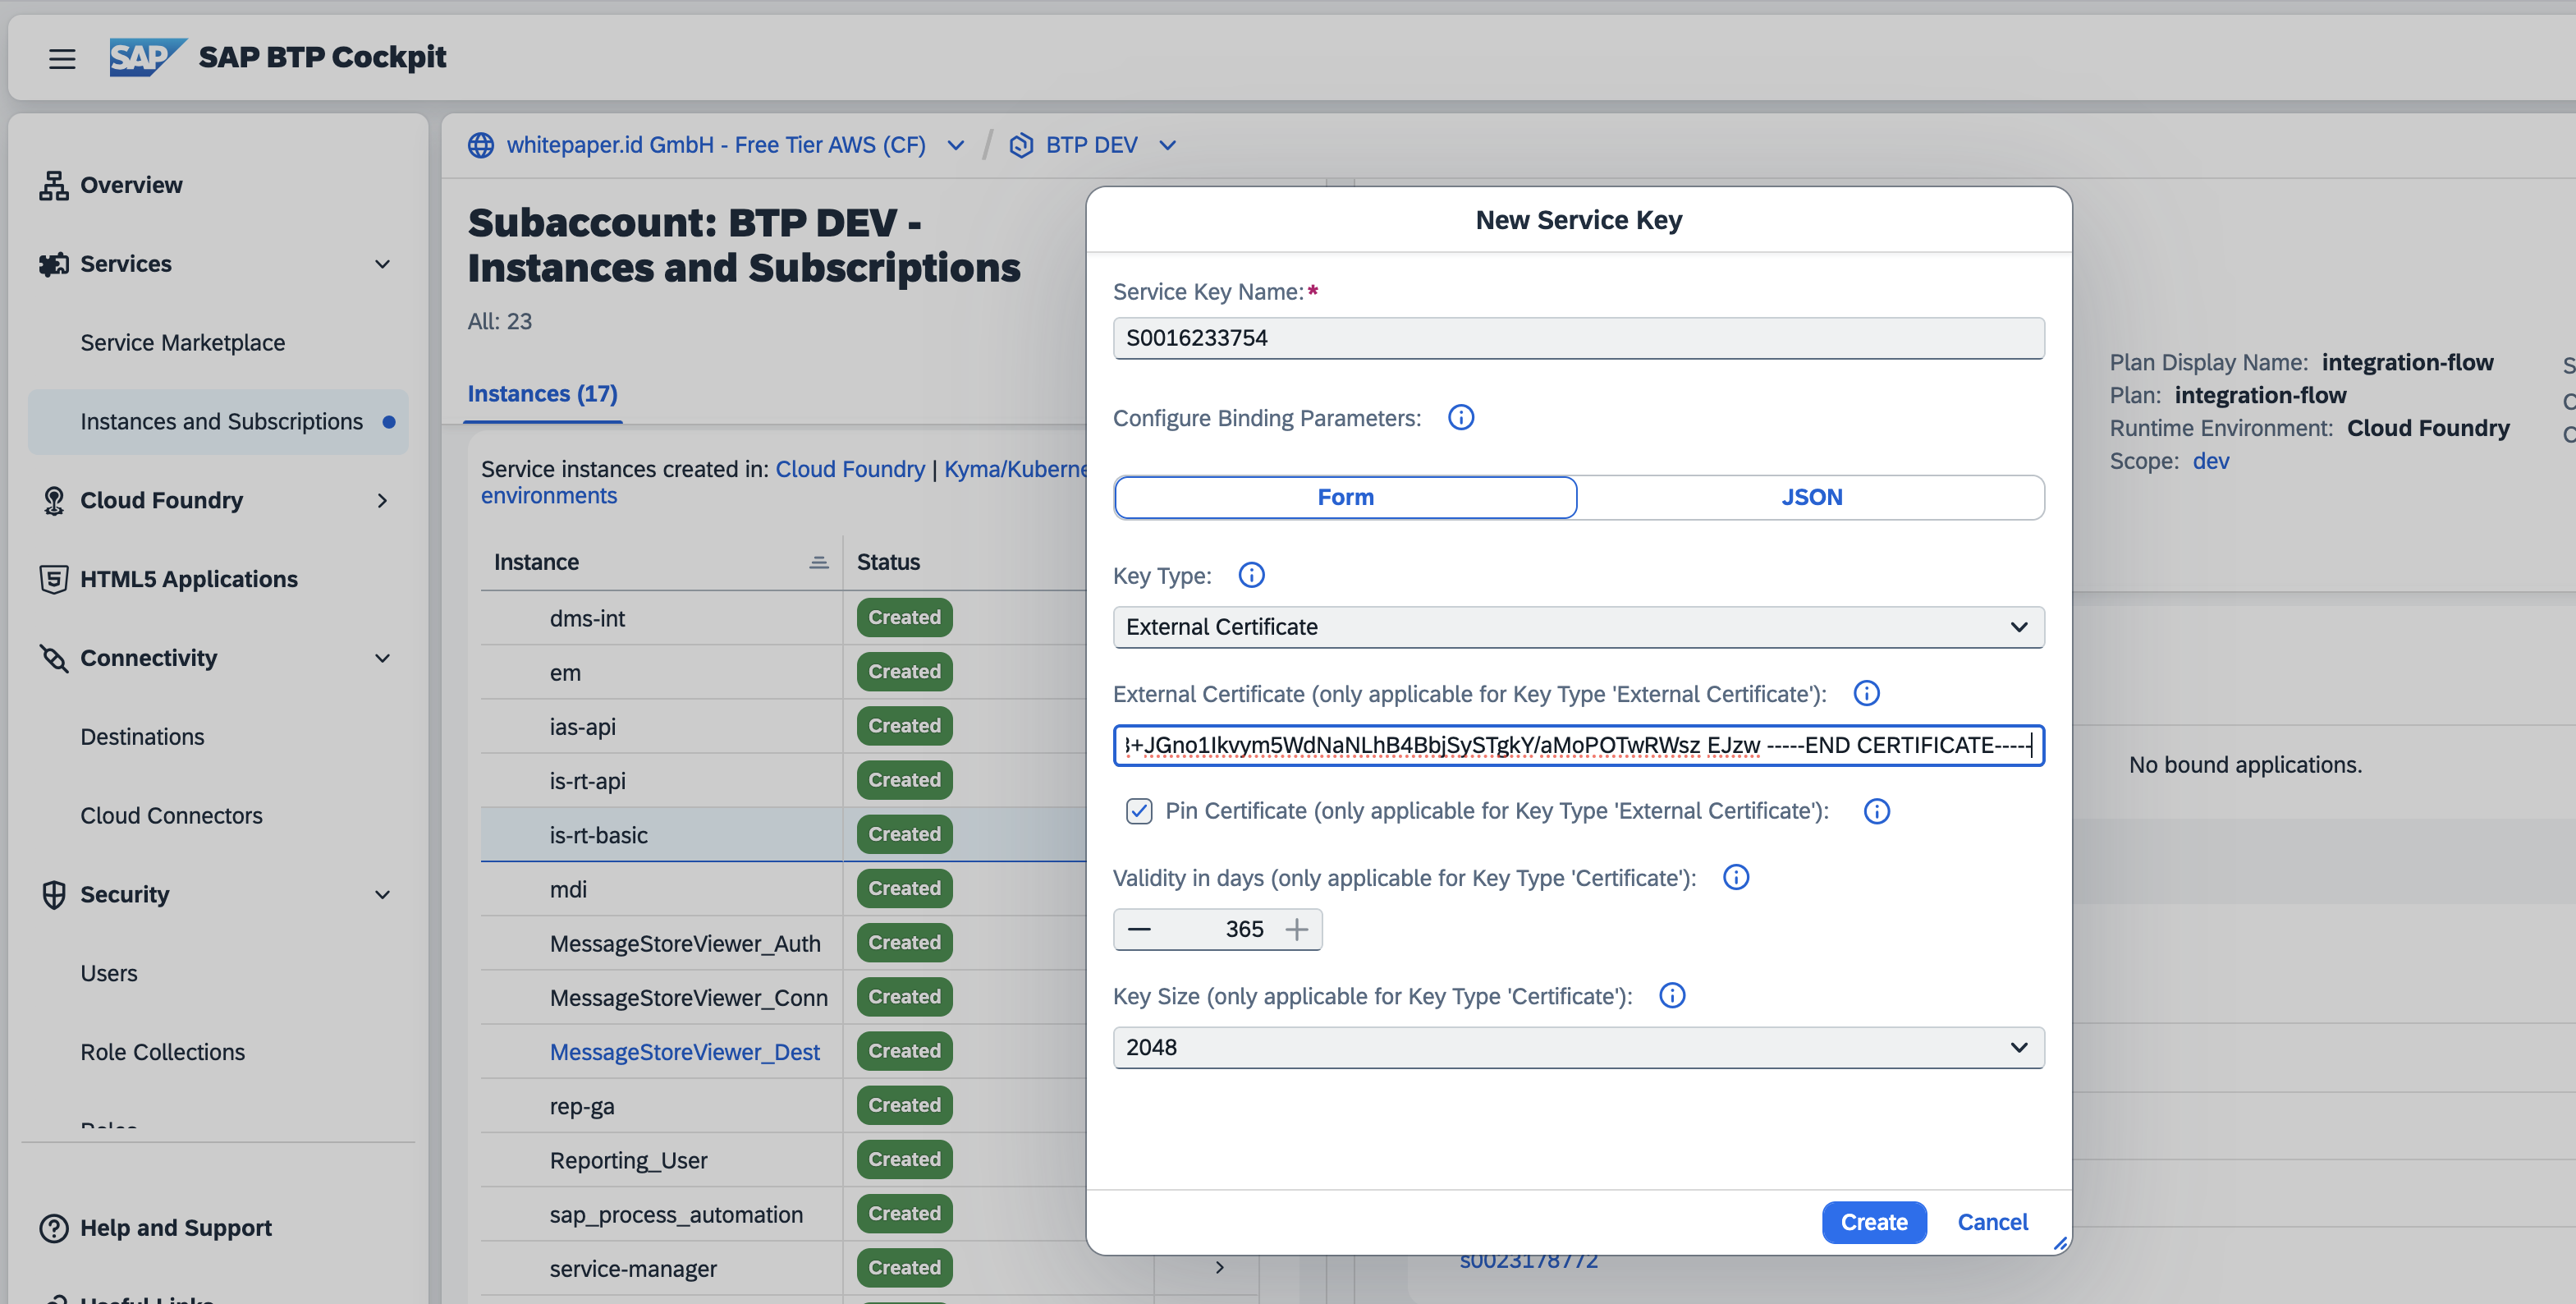
You can also use a certificate (e.g. S-User SAP Passport) and add it to the Service Key as an external certificate:
- Export your S-User Certificate from your browser as Base64
- Add the Base64 String as a Service Key

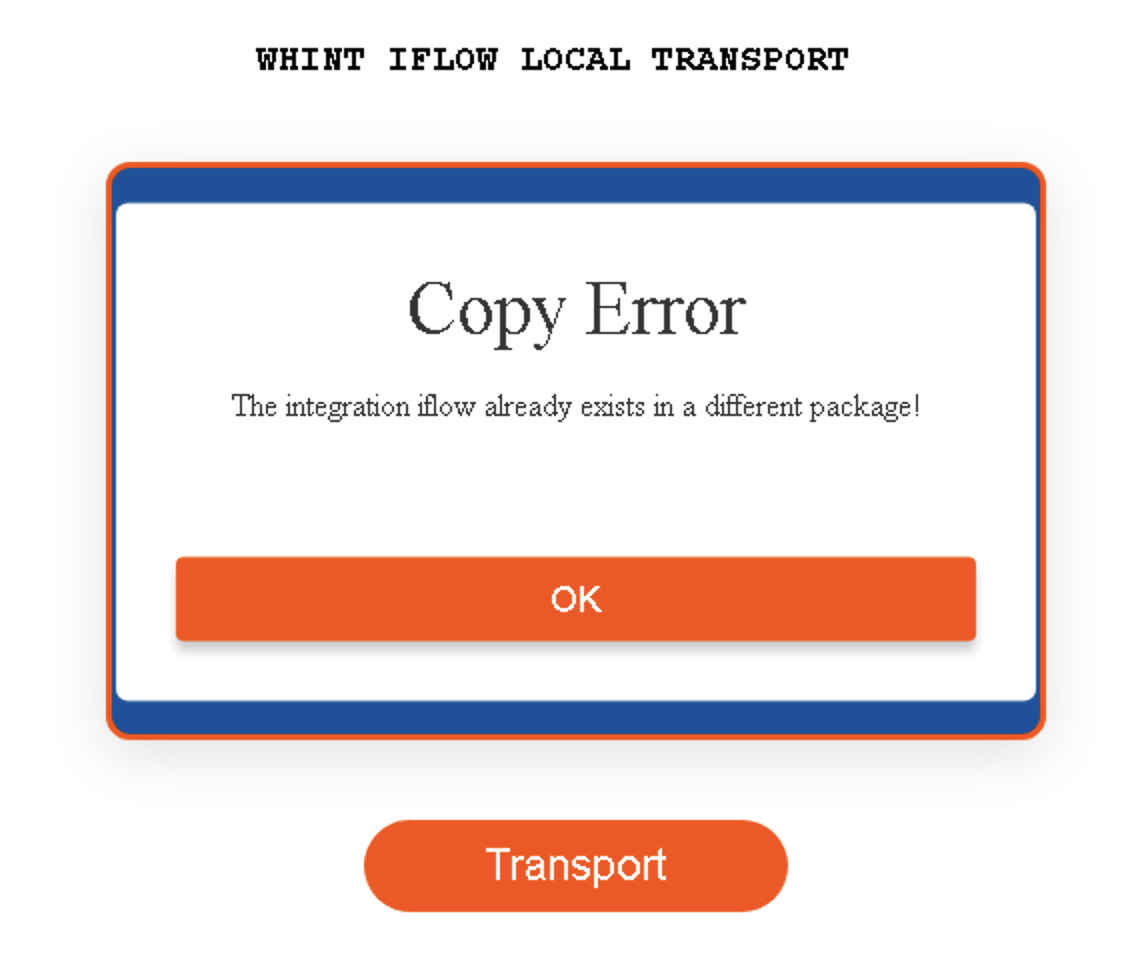
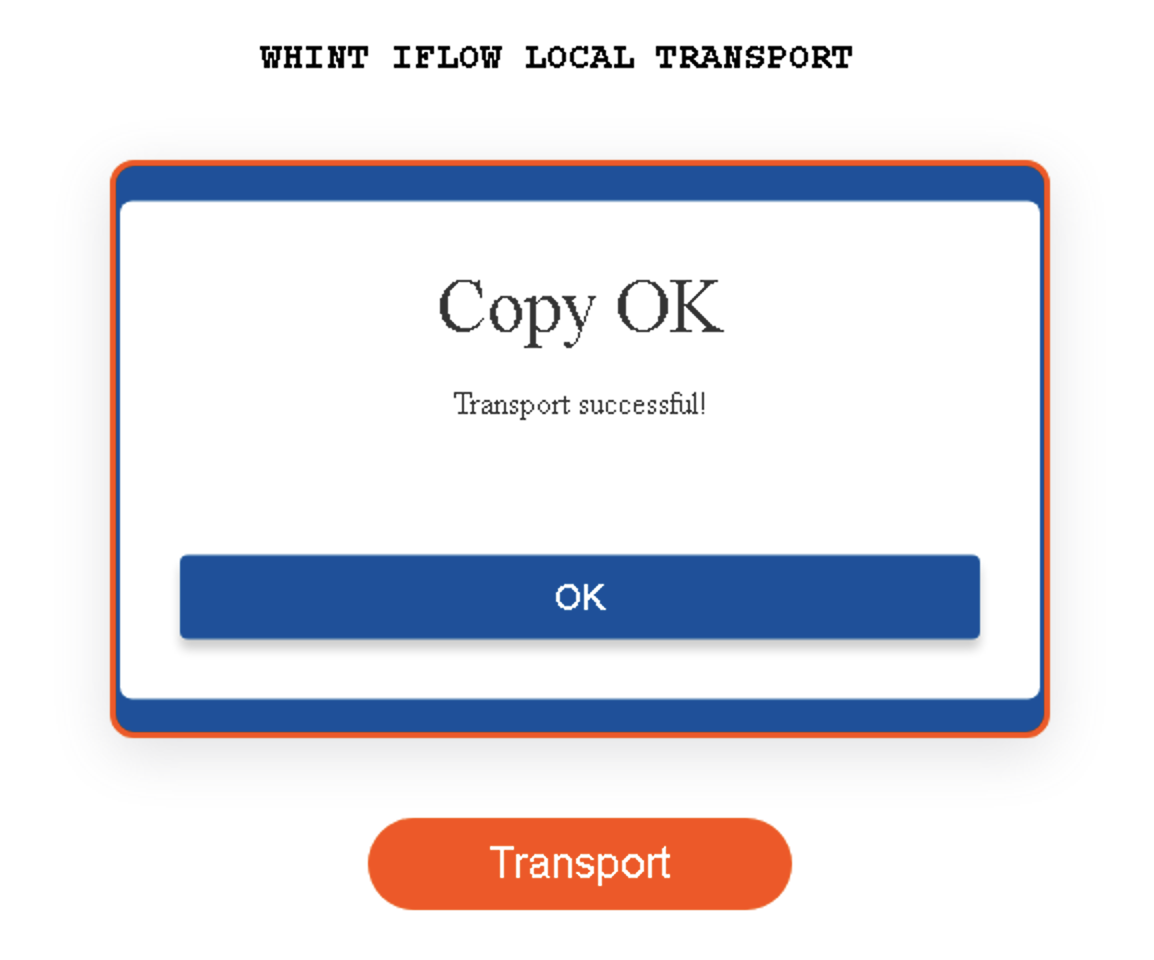
Run the Transport:
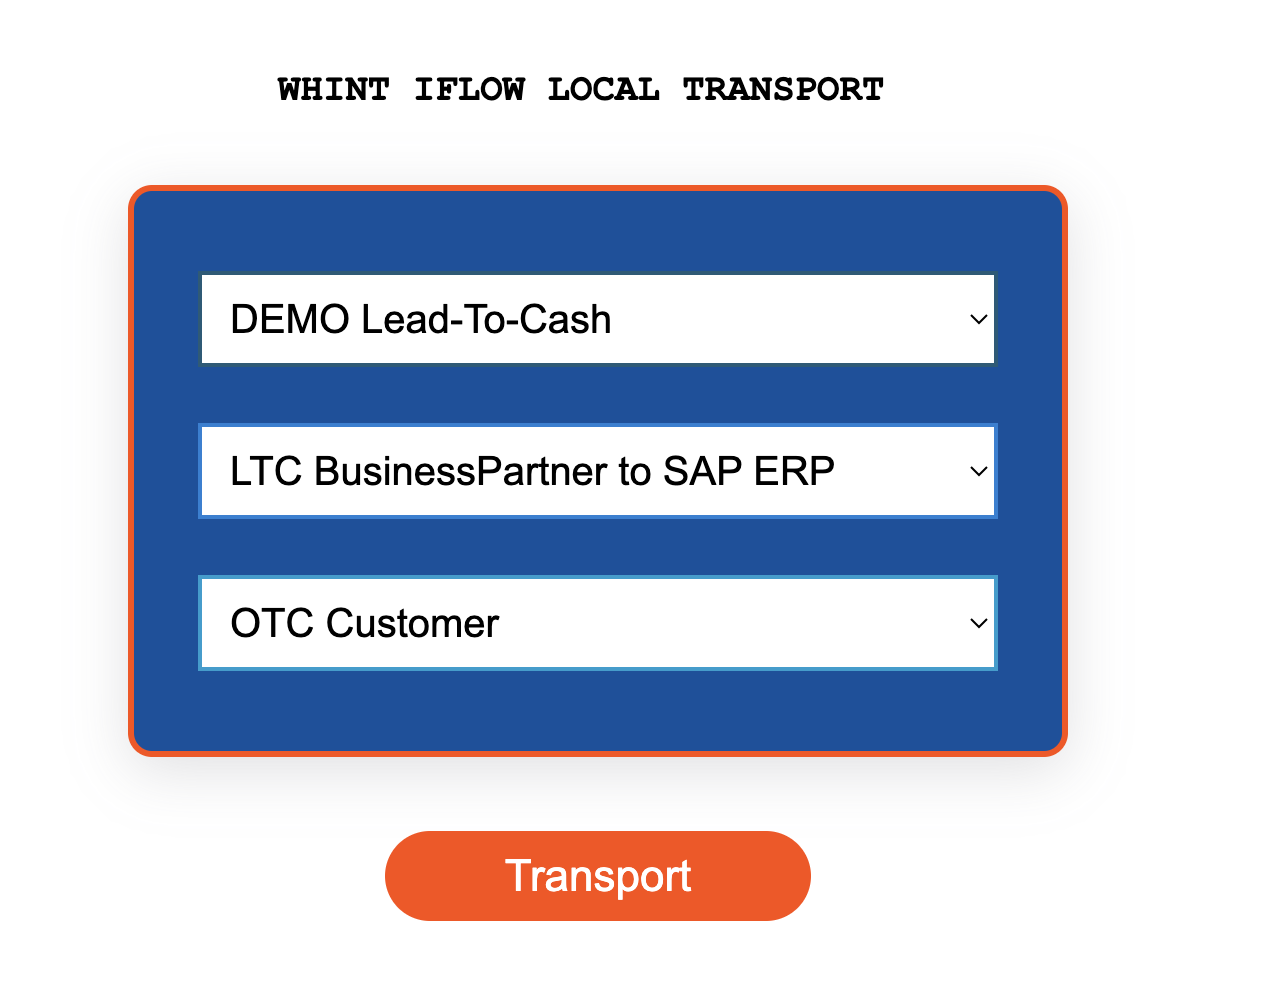
After you selected the source and target information, you can see the result below: